For some time, I’ve been fixing my and my circle’s iPhones in terms of hardware difficulties: battery change, screen replacement, etc.
As you may know, I also open up other things but in this post, I would like to share my experiences when opening up an iPhone as in what to do and not to do.
Actually, before we get started, these are really small details that might seem funny and idiotic at first but trust me, the devil is hiding in the details.
Know Thyself
If you’ve never opened up an iPhone before but you’re handy with repairs, sure, go ahead; give it a try. But definitely follow up the instructions.
Also, you might want to start with an old device as a practice-run. New devices(just like newborn babies) tend to be more precious in our eyes and you might hesitate while operating on them.
If you’re a veteran of self-repair, you might still want to follow up with the instructions since we’re all human and make mistakes. Especially when we feel more confident than we should. There is no drawback to spending a bit more time.
Take away: follow the instructions
Be Patient
I can’t emphasise this enough! You need to be patient when opening up your iPhone. It’s a small device with a delicate circuitry inside so if you act fast, you might break something which will lead to a delay in your repairs along with more money spent.
Take away: be patient
Only Buy From Respected Sellers
iPhones are everywhere. Therefore their spare parts are everywhere as well. However, that doesn’t mean that every spare part is created equal.
If you take the bait of buying the cheap spare part, you’ll most probably regret it. It could be that your:
- battery could heat up(happened to me),
- battery could explode(thank goodness, not happened to me),
- screen would not fit perfectly(that was a pain in the ass),
- screen won’t have the proper colour profile,
- screen glass could come off after a few falls due to the cheap assembly of the screen(that was disappointing),
- …
Therefore, don’t act cheap and don’t listen to what the other sellers are saying and go for the parts from reputable sources. As far as I’m aware of, there are only two reputable sources: iFixit and eTradeSupply.
I prefer iFixit because besides being top-quality, they’re much more cheaper with the logistics.
Take away: don’t be cheap
Careful with the Screws
Again, iPhones are really tiny devices. Hence, their screws are so as well. Therefore, when you’re trying to fit the screwdriver into a screw, be gentle about it.
If you open your iPhone just for a single time, you won’t feel it all too well but with repeated repairs on the same device, you can see some screws getting stuck because of the screw place getting damaged.
Therefore, gently place the screwdriver into the screw and then perform. This suggestion might seem childish but trust me, it will make sense.
Take away: screw gently
Don’t Use Glue
This one is specifically for battery replacement. iPhones are really tiny devices(yeah, that snarky detail again) that deal with millimetre precision. This makes them hard to produce. Apple has it under cover because you know, they’re Apple. But when you take things into your own hands, you need to handle this yourself.
When you are replacing your battery for a brand new one, if you use glue to hold it in place, you might/will end with the following scenario I ended up as below.
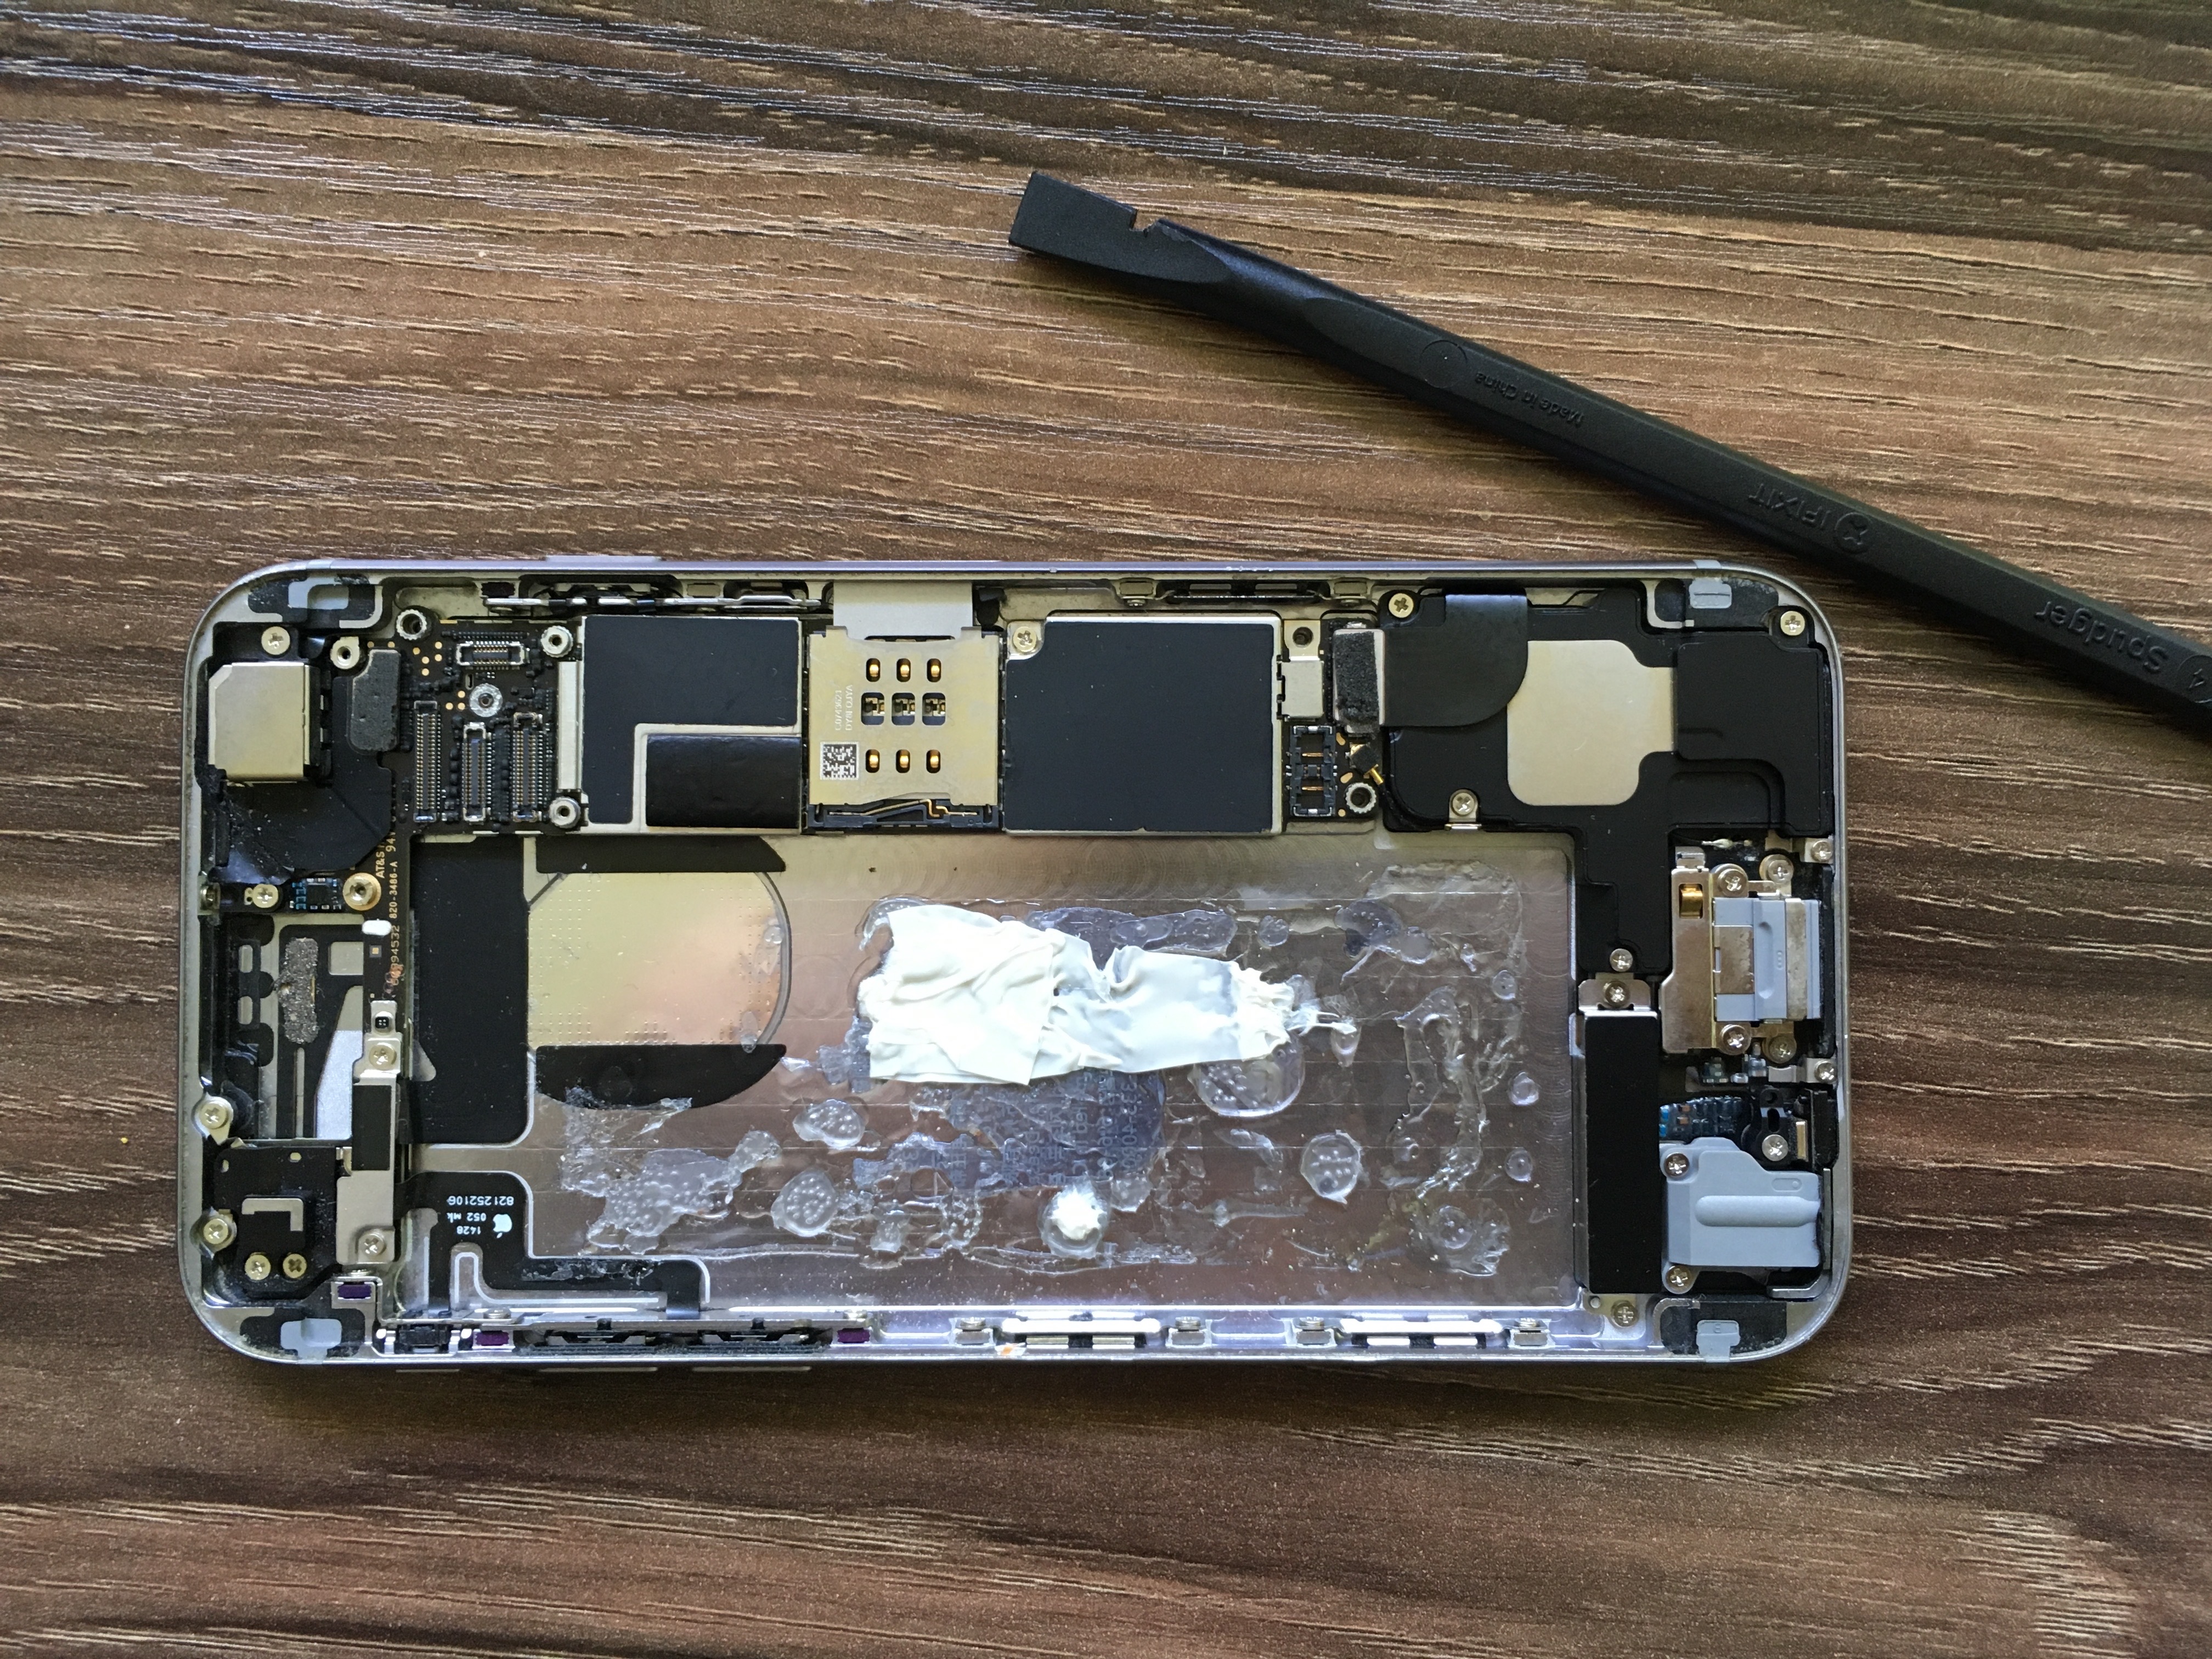
The glue does not distribute itself evenly and when it dries, it’s thicker than the battery strip you should be using. Therefore, in a case like this, you’ll end up with a screen that’s a little high on the left side which will definitely irritate you.
Hence, when you’re ordering a new battery, also order the respected battery strips with it.
Take away: don’t use glue but battery strips
Careful with the Strips
As I just mentioned above, do use battery strips for your battery replacements.
However, as a word of caution, be careful when applying the strips. Because there is a certain tension given to them and if you take them out of their packaging irresponsibly, they’ll just curl up and be unusable.
Therefore,
- just take one side of the packaging out,
- apply them onto your battery’s correct side,
- remove the rest of the packaging carefully and slowly.
iSlack
This is a magnificent tool even if you’re going to open up your iPhone just for once.
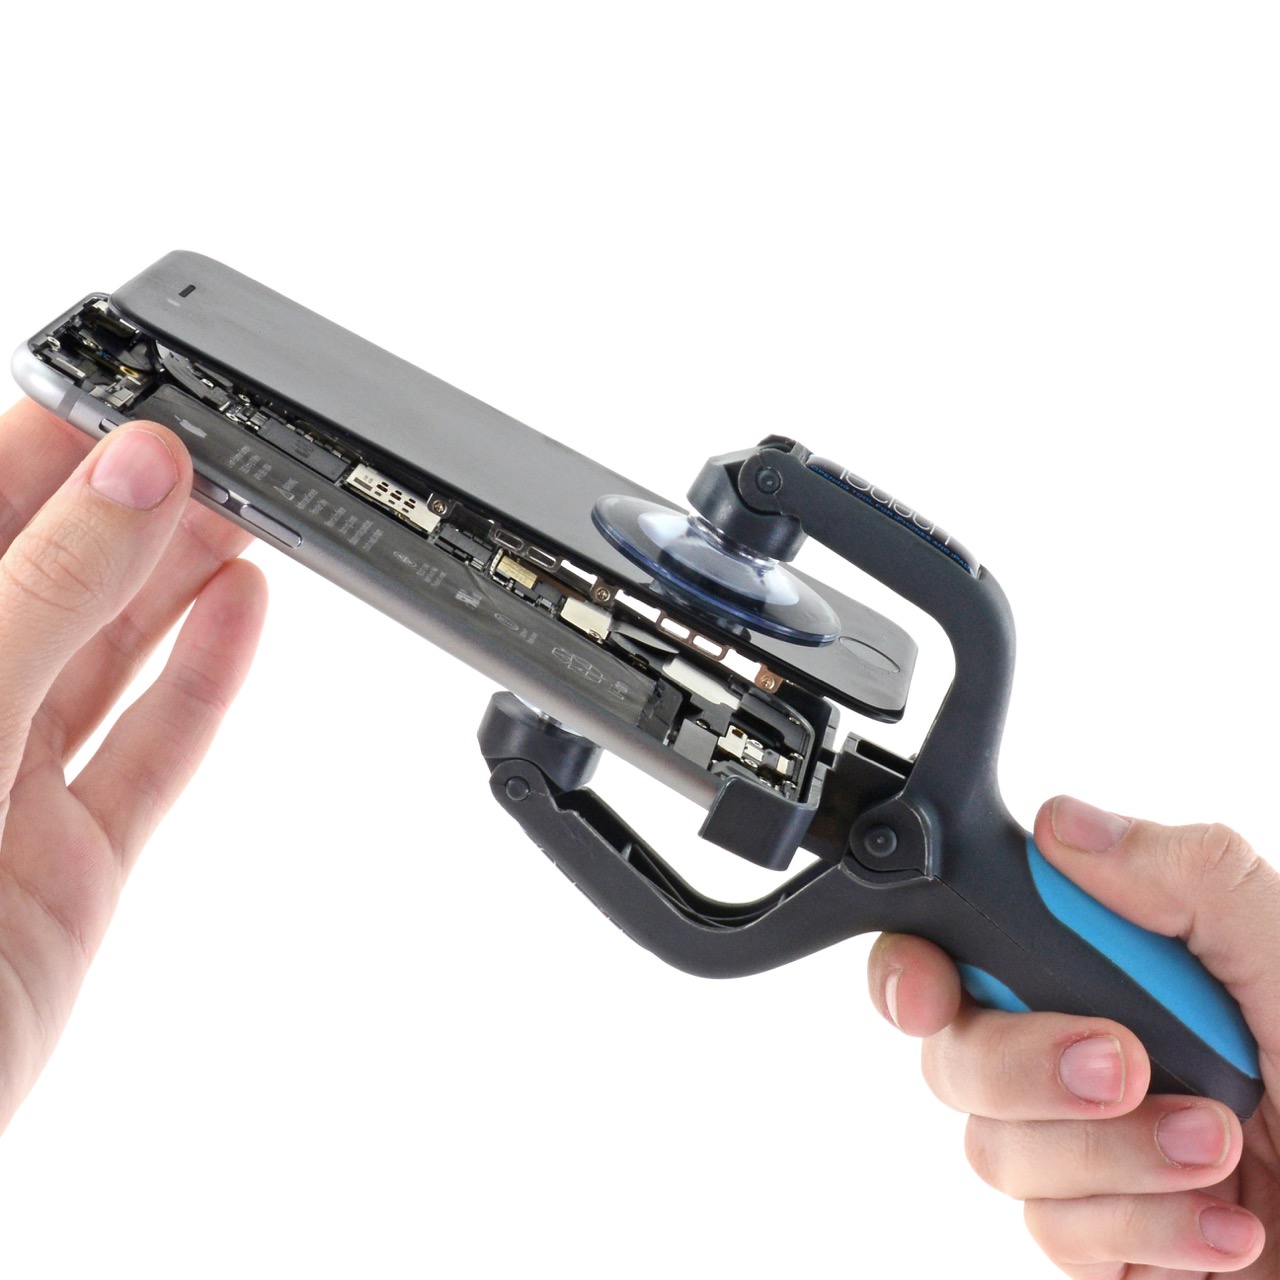
iSlack is a plier for opening up your iPhone and with just one move it opens it up to the point that’s just right so that you don’t have to worry about breaking the flex cables inside.
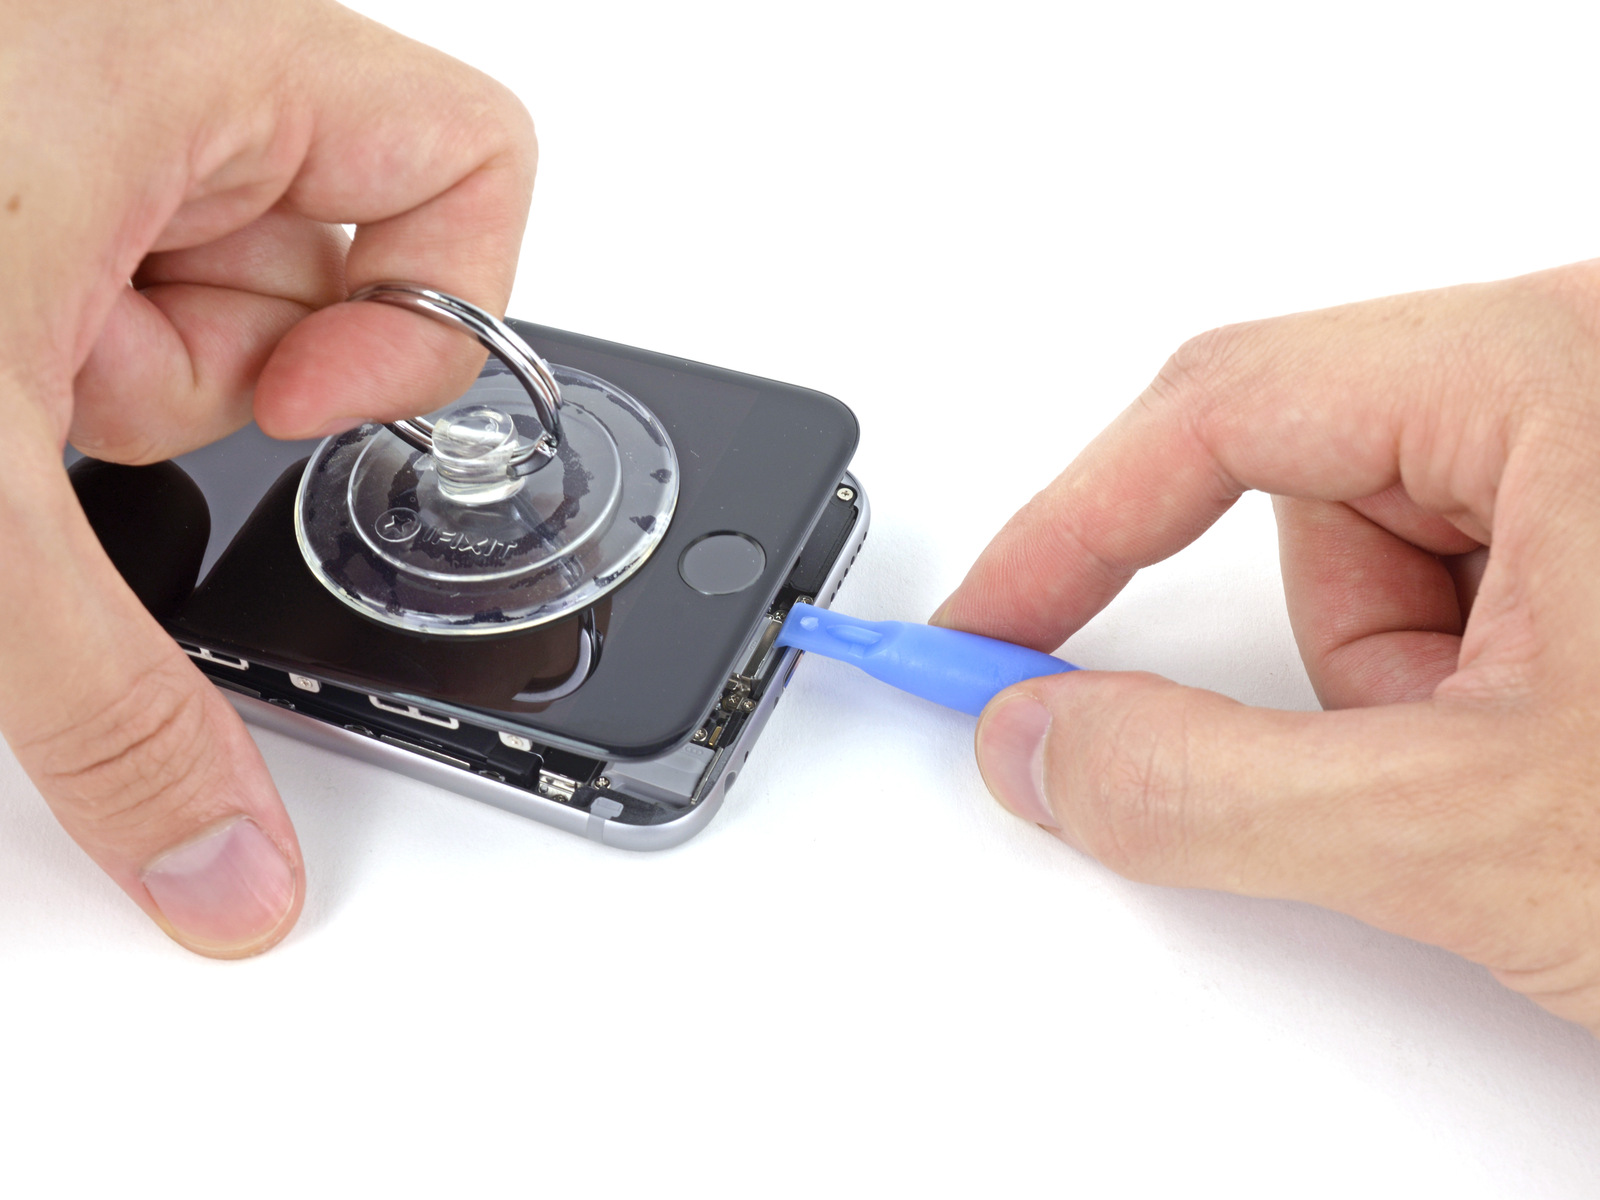
Otherwise, you would be spending way too much effort with the method pictured below and you would have to be far more careful when doing so.
iSlack can be a bit pricy for a single repair, yet again it still makes sense to buy one because it’ll save you a whole lot of time and some sanity. However if you’ll be continually doing repairs, it’s a MUST.
It can also open other things like iPads or other smartphones with similar to iPhone structures.
No Battery Changes in Winter
Alright, I’ll admit this ones a bit pushing it but I would advise against replacing your battery during the cold days of winter.
The reasoning behind this is simple, your battery will spend plentiful time outside in those cold winter days while being delivered and its performance will degrade. So, you’ll be starting off with a fresh new battery but it’s performance already worsened.
Of course, it’s not a substantial degradation and of course, you can’t know about the whereabouts of your battery shipped during cosier days but I would say it’s a good precaution.
Take away: no battery changes during winter
Conclusion
Well, there they are. I’ve tried to give you what I’ve learned through the years via the mistakes I’ve made.
The things is, as iFixit puts it, repair is noble. And along the way, you can/will make mistakes but in the end, you’ll get there.
Comments
under construction...